Spring Wreath

We've had a burst of spring down here in south Texas.  I know its only January but, our winter lasts all of 2 weeks.  Pretty dang awesome, right!?  That is, if you can get through the endless summers of course.  

I was searching the shelves of one of my favorites joints, Hobby Lobby, when I came upon this ribbon.

So cute, right!?  It also comes in green and pink.  Oh the possibilities!  

I was inspired right then and there to make this wreath:

Here's the ingredient list.  Two rolls of that neato ribbon, an 18 inch straw wreath, or foam or whatever floats your boat, some felt for flowers, and a ton of hot glue.

I started it off by wrapping the wreath.  Lots of dabs of hot glue on the back side, keep it all in place

Here she is, all wrapped up!

 Next came the artistic part, forming some felt flowers.  There are a ton of tutorials out there for these, but here's my version...

First of all, free hand a spiral circle on your felt.  The bigger the spiral, the bigger the flower.
 Next, cut it out...obviously.
 Then, starting in the center, start rolling, gathering and or pleating it into a flower.  This is where the hot glue becomes your best friend.  Unless, of course, you have a tendency to burn yourself like me.  There's a reason why I no longer own a high-temp glue gun.  I can't be trusted.
 This flower was loosely rolled and gathered.
 This one received no gathering at all.
 And for this one, I pleated it pretty heavily.  All of these different looks started out as a spiral.  Pretty fun right!?
 I also made a few burlap flowers to add to the mix.

Here's a close up of my flowers smooshed onto my wreath.
I wanted a touch of sparkle and thus hot glued some beads I had laying around into the center of some of those flowers.
One of my favorite parts was hanging her up with a green polka-dot scarf I recently got for a steal through Groopdealz.  She's just stapled to the top of my door.  Shhh, that's our little secret.
After reviewing these photos, I realized that my wreath was a little lopsided.  So, I went outside and squished her back into place.  Straw wreaths are cool like that.  I probably would have preferred using a foam wreath form, but couldn't find one big enough.  I like my wreaths big and bold!  However, I promise she looks symmetrical (mostly) hanging on my door now :).

xoxo,

Photobucket

G.I. Joe PartyTime!

Its birthday season around here.  I have three boys whose birthdays come in January, February, and then March. 
A very boyish Birthday cake
 I love to host birthday parties but would soon go crazy if I did three in a row every year.  Thus I began the every other year party rule.  My seven year old hit the magic mark this year and ask for a G.I. Joe party.  Being the girly, non violent gal that I am, I tried a bit to redirect him.  I was thinking more along the lines of rainbows and robots.  But, he had made up his mind and convinced me.  Not surprisingly that smarty pants was right on.  The party was a huge hit with all his little friends.  I had several parents tell me afterwards that their son came home more excited about the party than they ever have been before.

Unfortunately, this is not the year for G.I. Joe party paraphernalia   The only trademarked item I could find was the little birthday centerpiece you can see in the middle of the table.  It was being clearanced out at Oriental trading company, so at least I got it for dirt cheap.   


 So, this party turned into more of an army themed party.  Which turned out to be a great move.  There are tons of ideas on Pinterest for army themed parties and camouflage party goods are abundant. 

When the boys arrived, they each were given a Rambo style headband.  The camo head bands came from Oriental trading (along with most of the other party goods)
Then the party kids were directed to a table to make their own marshmallow shooters!
I found tons of tutorials to make these online.  Basically, they are made with 1/2 " pvc pipe and connectors.  We own a miter saw.  So, I was able to quickly slice and dice the pvc pipe into 4" and 7" sections.  We also needed T joints, L joints, and end caps.  I made a little diagram for the boys to follow.
Each piece was assigned a letter and could be found in the labeled bins.  However, most of the boys ended up freestyling their designs.  Amazingly, all of their concoctions worked just fine.  I wish I had bought a few more of the different connectors, though because the boys who came in late had limited options. 

 It was super duper fun to see what they came up with.

Here are a couple of dads who directed the marshmallow shooter mania. 

 I made sure there was a sharpie for the boys to label their own gun, along with some camouflage duck tape for decorating.
Throughout the party, the boys had a blast running around pelting each other with our marshmallow ammunition.
The chocolate bombs (whoppers) and rescue ropes (Twizzlers)  received rave reviews as well.  In fact, I was surprised at their cute reactions to the labels.  Apparently candy bars aren't just for the girls!
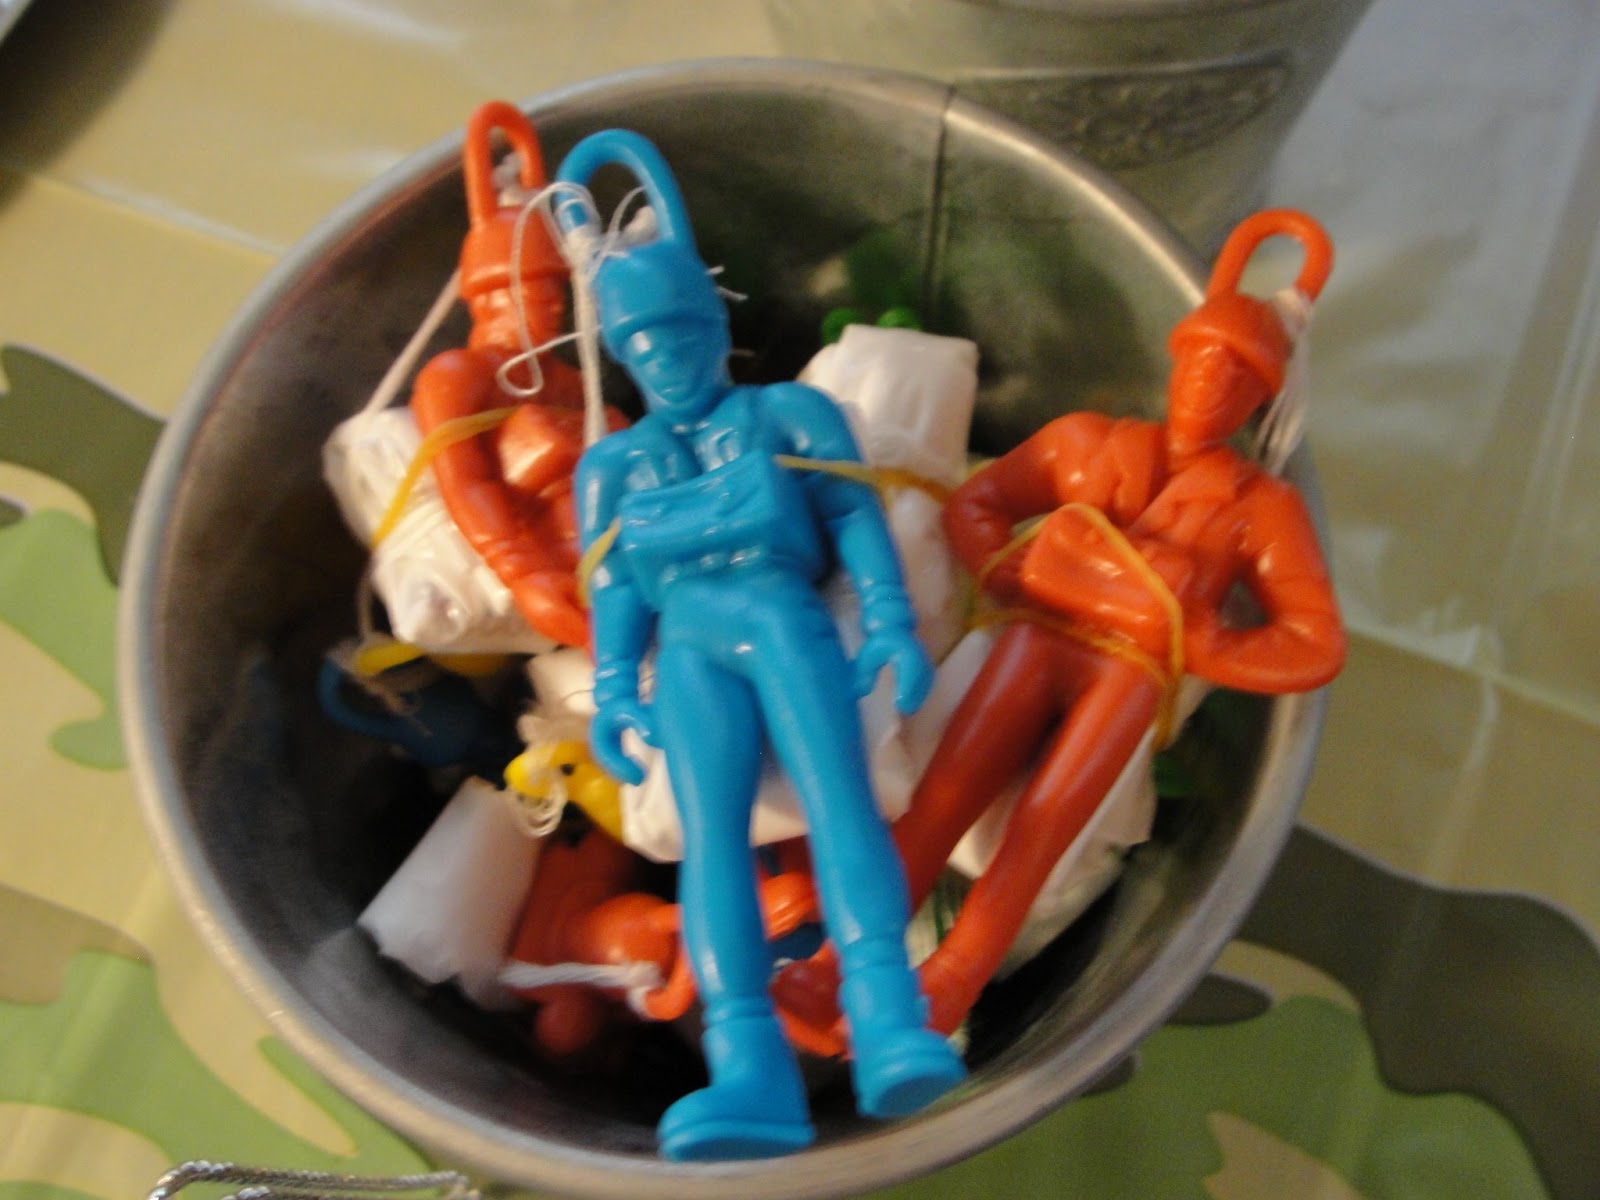
Following the marshmallow shooter construction, The boys went on a search and rescue mission to recover some lost soldiers.  We had pre-hidden some army dudes in the front yard that they had to go find. 

 It was even better than an Easter egg hunt because they blended in with the grass.  Our lawn mower will probably find a couple this spring.
Yep, those kids are running around in shorts and T-shirts in January.  Just one of the advantages of southern living.

Once those army dudes were recovered, each boy was awarded with official dog tags.  Actually, I just used a sharpie to write in their names.  But, they thought it was pretty cool anyway.  I even saw a kids wearing his dog tags to church the next day.
Then came the paratroopers.

We have a scary cool opening upstairs in our loft that makes the perfect parachute launching platform.

 These were closely following by flying airplanes.  Here they are in their packages.  The boys got to build their own.
I don't have any great, non-blurry pictures of the airplane flying.  But this is what our stairs looked like.  They sure got their work-out in with all their running up and down.

One of the little airplanes is resting on the table, if you look closely.


Those crazy boys needed a couple of water breaks.  Fortunately, we had lots of water bottles.


Then they munched on army guy cupcakes.


I tried to make camouflage frosting.  It sorta worked.
I made the boys eat on our driveway since our table was preoccupied with being cute and full of party goods.


 The cupcakes were well received.

 Birthday boy with his buddies.


I asked him to pose for Grandma and this is what I got.
Sorry Grandma.

After some present opening and a lot more marshmallow shooting, the boys left with a sack of treasures.
I gave them each a bag of extra ammunition (marshmallows), some army guys and airplanes.  I have since been blamed for marshmallow all over my friend's houses.  Sorry bout that.

Originally, I had planned an obstacle course too.  But three days of rain made for a very muddy backyard and it was easier to just skip it.

We had a blast all the same.

linking up to Tater Tots and Jello
Photobucket

January Organization

Every January, I get the bug to do a little organizing around the house.  Just a couple of little projects to breath some fresh air into an otherwise boring house.  After months of fall and Christmas decorations, the house seems a little bleak.

I thought I'd share a few of the solutions I've found recently that have made my life a little nicer.

Introducing...the mason jar.


It's found its way into lots of crafts lately, but I've discovered, that its the perfect desktop organizer.

Especially, when it comes to bakers twine.  There's a lot of twine in my life lately.  I use it daily to package my Piccadilly products for sell.  But, I can't seem to stop there.  Now that its a regular part of my desk top, I seem to be tying up everything with twine.  Watch out little boys.  You might find yourself tied up with bakers twine if I get really desperate!  These half pint sized jars keep it handy, and prevent it from rolling  away when I snip off a few feet.  

Next up...the Cracker Jar.

These amazing jars are easily to find at Target, Walmart, etc.  They come in three sizes (maybe more).  But, my favorite part is...they're cheap.  Yep, cheap, just like me.  I paid under $6 a piece for these large jars.  Since when does anything pretty cost less than ten bucks...seriously...so awesome.   They been featured in my pantry for years.  But now, I've discovered that they make brilliant art supply storage.  

Previously, all crayons, markers and colored pencils in my house where thrown haphazardly into a desk, art supply bin, toy box, etc.  Then when I got sick and tired of finding open markers under the bed, or crayons in the couch, I'd just throw them away.  I threw a lot away!  However, since I found this lovely solution, they all have a pretty home and thus are saved from the trash bin.  Bonus... my boys are doing a lot more coloring around here!

I'm a little embarrassed to show you these pictures because its pretty messy.  But, It's been such a fab solution, that I'll go ahead and do it.  Like many of you, my scrap book paper collection has dwindled in recent years.  I've quit buying pretty paper it in favor of digital options.  My stack of paper has shrunk as I've used it up for lesson handouts and modge podge crafts.  However, I still had these nifty scrapbook paper organizers.  

I've discovered that they make fabulous places to house my boys art projects.  My middle child is especially crafty and his needs a little purging.  I'd love to make him a photo book online to replace the exploding folder.  Someday...someday.  

The over sized pocket works well for those big construction paper projects, and they are pre-equipped with a label.  Maybe when I get those photo book made, they can be stored up here too.

Well, that's it for my organizing...at least for now.  I'm sure my OCD will lead to more organization sooner than later.  I'd love to see all of your great solutions.  Anyone have a suggestion for a Master Bedroom closet that stores everything and anything I don't have another place for?  It's in desperate need of an overhaul...but then where would I put all that stuff!?

Photobucket