Showing posts with label My house. Show all posts

January Organization

Every January, I get the bug to do a little organizing around the house.  Just a couple of little projects to breath some fresh air into an otherwise boring house.  After months of fall and Christmas decorations, the house seems a little bleak.

I thought I'd share a few of the solutions I've found recently that have made my life a little nicer.

Introducing...the mason jar.
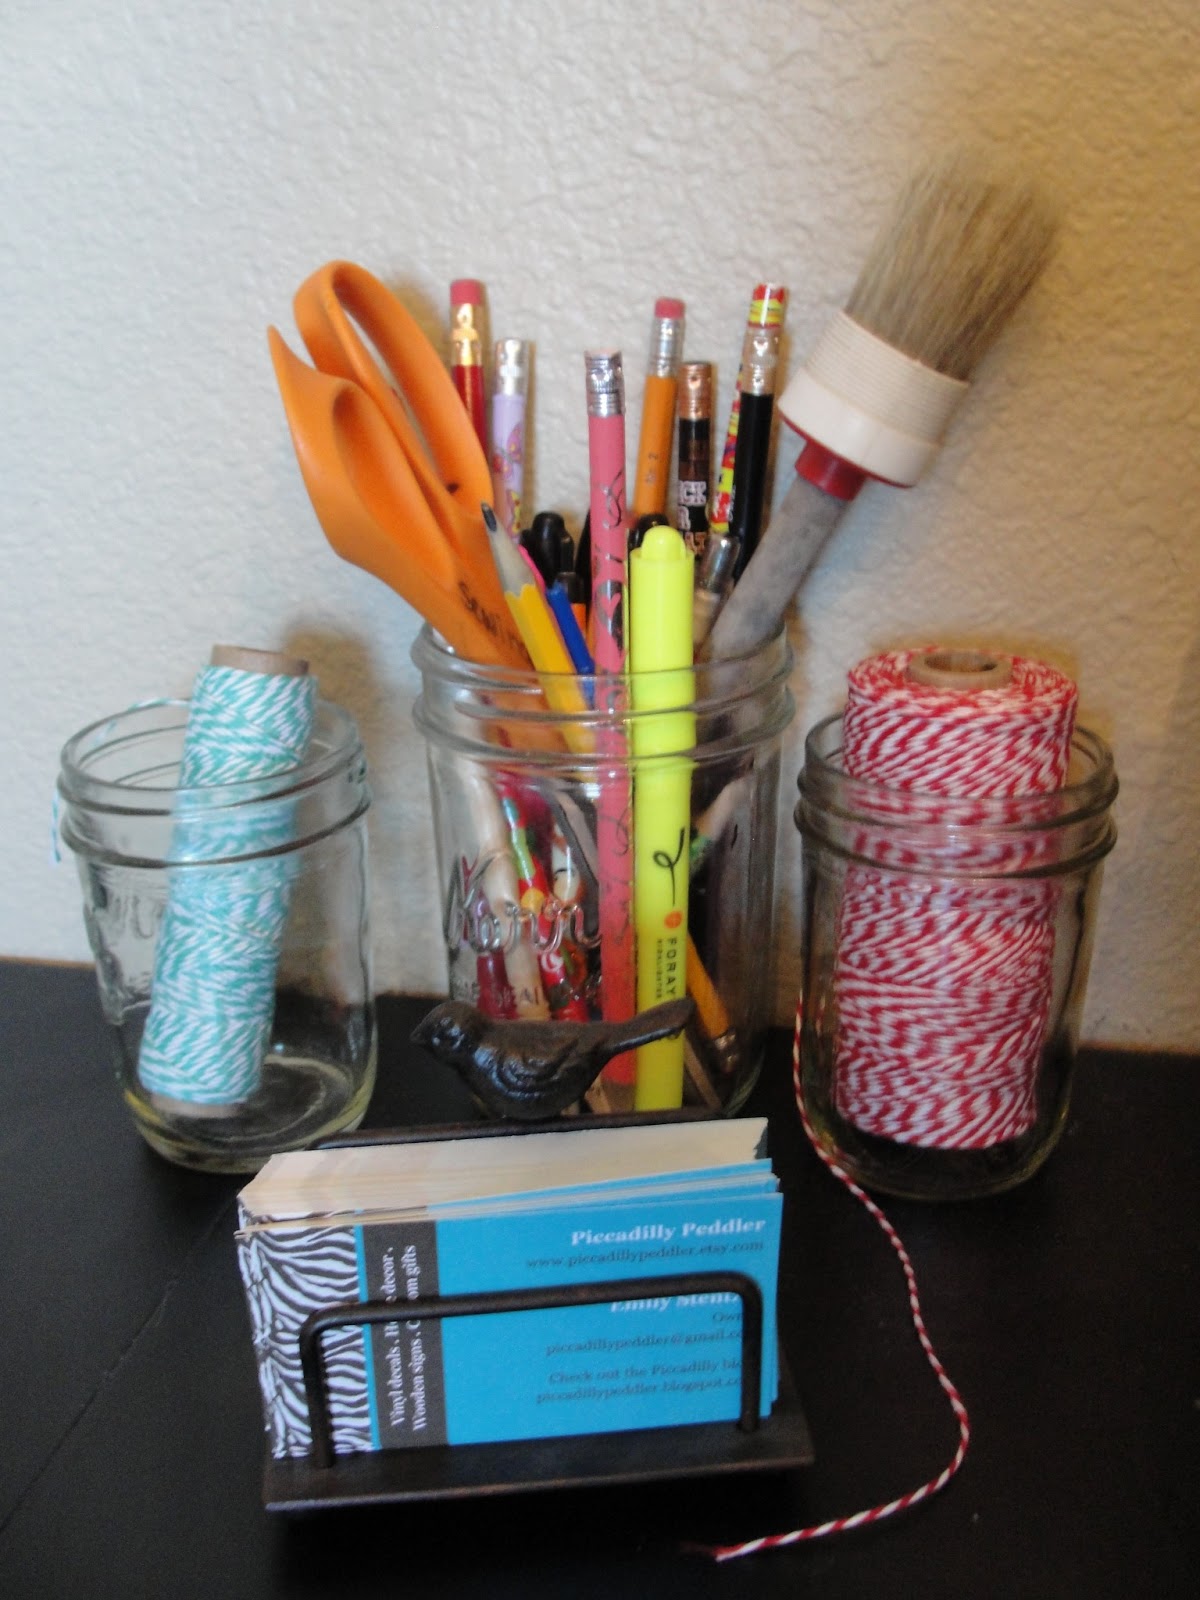

It's found its way into lots of crafts lately, but I've discovered, that its the perfect desktop organizer.

Especially, when it comes to bakers twine.  There's a lot of twine in my life lately.  I use it daily to package my Piccadilly products for sell.  But, I can't seem to stop there.  Now that its a regular part of my desk top, I seem to be tying up everything with twine.  Watch out little boys.  You might find yourself tied up with bakers twine if I get really desperate!  These half pint sized jars keep it handy, and prevent it from rolling  away when I snip off a few feet.  

Next up...the Cracker Jar.

These amazing jars are easily to find at Target, Walmart, etc.  They come in three sizes (maybe more).  But, my favorite part is...they're cheap.  Yep, cheap, just like me.  I paid under $6 a piece for these large jars.  Since when does anything pretty cost less than ten bucks...seriously...so awesome.   They been featured in my pantry for years.  But now, I've discovered that they make brilliant art supply storage.  

Previously, all crayons, markers and colored pencils in my house where thrown haphazardly into a desk, art supply bin, toy box, etc.  Then when I got sick and tired of finding open markers under the bed, or crayons in the couch, I'd just throw them away.  I threw a lot away!  However, since I found this lovely solution, they all have a pretty home and thus are saved from the trash bin.  Bonus... my boys are doing a lot more coloring around here!

I'm a little embarrassed to show you these pictures because its pretty messy.  But, It's been such a fab solution, that I'll go ahead and do it.  Like many of you, my scrap book paper collection has dwindled in recent years.  I've quit buying pretty paper it in favor of digital options.  My stack of paper has shrunk as I've used it up for lesson handouts and modge podge crafts.  However, I still had these nifty scrapbook paper organizers.  

I've discovered that they make fabulous places to house my boys art projects.  My middle child is especially crafty and his needs a little purging.  I'd love to make him a photo book online to replace the exploding folder.  Someday...someday.  

The over sized pocket works well for those big construction paper projects, and they are pre-equipped with a label.  Maybe when I get those photo book made, they can be stored up here too.

Well, that's it for my organizing...at least for now.  I'm sure my OCD will lead to more organization sooner than later.  I'd love to see all of your great solutions.  Anyone have a suggestion for a Master Bedroom closet that stores everything and anything I don't have another place for?  It's in desperate need of an overhaul...but then where would I put all that stuff!?

Photobucket

A few of my favorite things

 It's a Christmas Miracle!  I'm finally updating my blog.  Of course, I finished this project six months ago, so I'm still officially a blogging slacker!

C'est la vie.  

Last summer we desperately needed to replace our saggy mattress.  Being the overachiever that I am, I decided to go ahead and revamp our entire master bedroom.  It was time.  Past time really.  Why oh why, do we mom's put our own rooms very last on the list of things to do?

Our room went from miscellaneous hand-me-down ally to my favorite room in the house.
 I seriously feel the urge to enter and rejuvenate every time I pass my bedroom door now.
Isn't our new bed luscious!?  It beckons me to nap in it way too much these days.
I just want to curl up with all those pillows.  I found the bedding through Ballard design.
These metal plaques from Hobby Lobby float above the chunky dental molding.

Before this chunky bed came home, I painted the walls Lyndhurst Castle Sand from Valspar at Lowes.
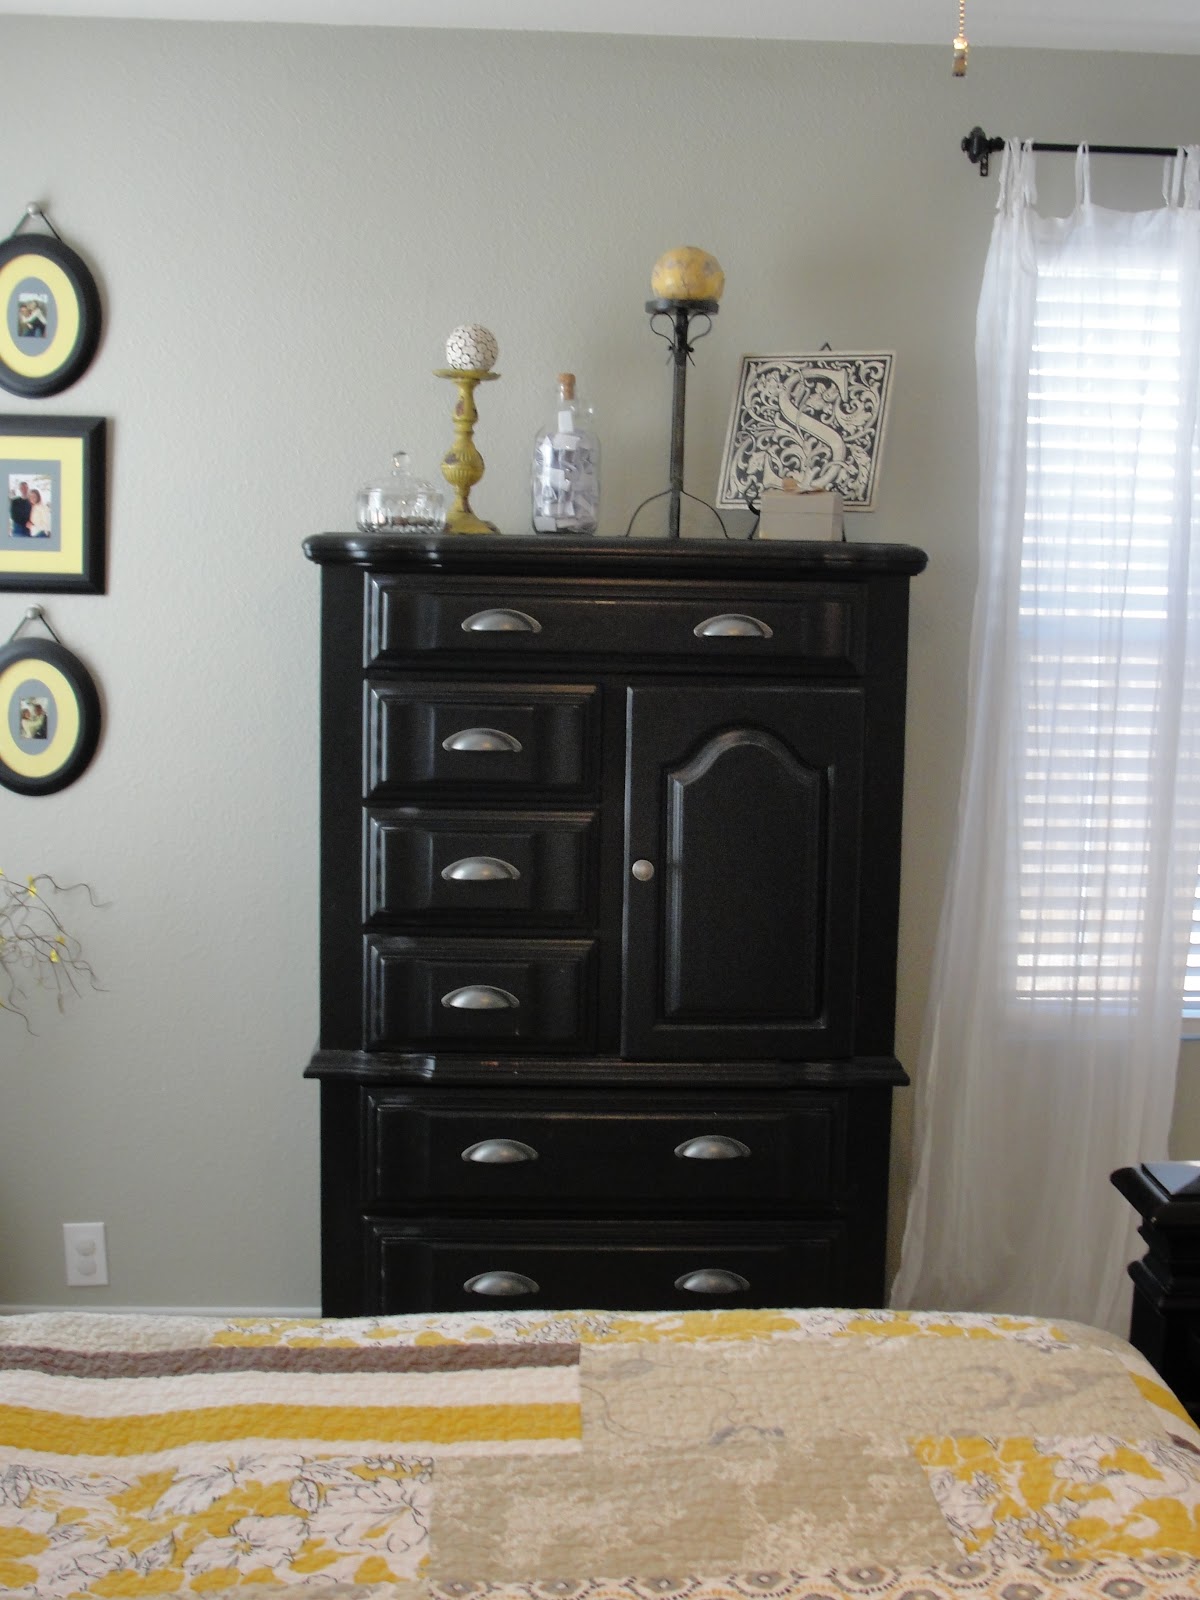
Enough about my love affair with the bed!  I'm also pretty enamored by this armoire set up.  The armoire is a hand-me-down from my parents.  But, I love it's shape and updated it with fresh paint and bin pulls.
Previously, the top of our armiore was a dust collecting pile of whatever.  Put now, it displays some of my favorite things.  A cute box from my cute Sis. in law.  "S" for our last name.  A jug of love notes to my main squeeze.  And a pop of my new favorite color, yellow.
 These fun frames used to have red and white mats.  But a few coats of paint updated them to match my new room.  I think they look even better with our engagement photos than before.  We look so young in those photos!
 My parents brought me this pot from one of their many adventures.  I love the textures in this thing!  I filled it with some botanicals from Hobby Lobby.
 Next to the bed, rest a couple of end tables.  Also hand-me downs from my parents but painted in the matching black.  


 A pair of mercury glass lamps with burlap shades balance the tables


While my son's artwork and Grandma's jewelry box grace the top.  I think of them every time I look here.
The wall opposite the amoire houses a cedar chest from my parents and some beautiful family photos.
The photo display was made possible by Rod Works.  Rod works is a Utah store with the cutest home decor.  They now sell online, yippee!
The curtains on our three windows came from World Market.  I thought seriously about making my own floaty tie top curtains.  But these were such a good price, I couldn't imagine why I'd want to do that to myself.
And finally, the wall opposite my bed.  Those french doors lead to our master bath.  A post for another day perhaps.  One where I've recently cleaned my bathroom!

I little wreath also hides in the corner of this wall.
I had so much fun creating this room for us.  I'm thrilled that my own room is finally a place that I love to be.  I hope each of you gets to have a happy place of your own!

Another project bites the dust

 I'm listening to my kids playing DJ hero in the background.  They're mixing the tune, "Another one Bites the Dust".  Subliminal messages creeping into my post title.  Anyhow, I did get to check another project off my to do list last week.  It felt awesome since it had been on the list for almost an entire year.  


It all came about when last spring I asked my seven year old what he wanted his room to look like in our new house.  We had a little planning session.  Some of his ideas got vetoed due to complexity (he's a very creative soul).  However one idea he had that I wanted to run with was to have a giant map of the world in his room.  The kid loves maps!  He gets  more excited at amusement parks about the map he gets to carry around then the rides or food.  And if we enter a bookstore, he zooms towards the atlases.  


I adored the whole map idea.  First of all, we are talking CHEAP artwork!  And secondly, very educational.  I'd love my children to be more globally minded and what better way to start  than with a global picture :)  So, the next time we went to the bookstore, I bought the giant map in the atlas section ($10 - not bad).  But, that's where my enthusiasm slowed down.  The project got pushed to the back of my list and even though every few weeks my sweet boy would ask about it, I didn't deliver.  Finally, I got motivated and made that map happen.


Here's a simple tutorial for anyone who wants to add this to their own home.


First I measured the outside of the map and bought enough molding at home depot to cut a frame.  When measuring, don't forget that you'll need enough to account for the angled cuts at the corners.  So, add the width of the molding times two and the width of the map together to get the total width of molding you need (of course you have to do that for all four sides to get a complete length needed).  It's always a good rule of thumb to over buy a bit in case you make a mistake.  


Then I used my miter saw to cut the four pieces of molding to make up my frame.  My best framing tip is to measure and cut one side out, and then use that already cut piece to trace the next side out.  This works better than measuring them separately because they always end up being off slightly.  When building a frame, the two sides opposite each other need to be exact mirror images of each other or the frame will not line up correctly and you'll end up with gaps in your corners.


I tried to adjoin the corners of my large-ish frame using a plate joiner - otherwise known as a biscuit cutter.  However, the molding I chose was not thick enough for my plate joiner (thank goodness for wood filler).  So, instead I did the best I could with glue and staples on the back.  This made for a rather flimsy frame so, in the end I ended up just screwing the frame directly into the wall around the map.  I was trying to avoid this so it could be easily moved but, that ended up being the best option.  I was too afraid of it being knocked down while my boys used the bed as a wrestling arena.


I spray painted the frame to match my son's headboard.  But spray paint definitely isn't the only option.  I chose Krylon brand (found it at Lowes) satin spray paint in navy blue.  It required a couple coats.


Before bringing the frame inside, I taped the map directly to the wall making sure it was centered and level.


Then, my son helped me carry it upstairs and held it steady while I used a drill to attach it into place.


Here it is hung up with the bed actually made.  Woohoo! (that remark was for both the completed map and the neat bed)

Let's get organized part I

Every January I get the urge to organize the chaos in my life.  Not sure if that has more to do with detoxing from Christmas clutter or a new year with new beginnings.  Irregardless, its nice to actually get something done that  results in a lasting improvement.  All you multi-tasking moms know what I'm talking about.  We're always busy but, usually it's busy with things that we'll just have to do again tomorrow.  Sometimes, we have to do them again in 20 minutes.  Thus, sinking our teeth into a task that will actually change the way we live, or at least the way our closets look, now that feels awesome.

Speaking of closets, we've been blessed with quite a few good sized ones.  However, sometimes that means just more room for things to get messy in.  Last week, I made a simple adjustment that has already proven to be most helpful.  I added shelves.  

Previously, our closets had one shelf way up high above the top clothes rack/rod, whatever you call that thing .  I just added a second shelf above the lower clothes rod thingy.  

It was super simple.  I bought prefinished MDF shelving boards and cut them to length.  Then I slide them in and added a couple of screws.  Since the racks were already in place, that's all there was too it.  No routing, painting, sanding, etc. required.  And, they were very affordable.  I really don't know why the builder and/or previous home owner didn't do it before.  Because having extra shelves totally rocks!
And now I have a place to store my 5 year old's six sets of Legos he got for Christmas and his birthday.  That's right, 6 sets - mostly star wars.  He's slightly obsessed.  
I used some vinyl labels to keep things organized.  This is only three of the six boxes he now has in there.   I'm liking these labels so much that I think I'm going to add them to my laundry room and pantry (hence the part I title).  Hopefully I'll even add them to my etsy shop soon.
Do you guys have any favorite organizing tips.

Front Door House Numbers 33% off Today only

Certifi Kid is featuring my Front Door house numbers today for 33% of the traditional retail on Etsy.  This offer is good for today only, so hurry on over to http://www.certifikid.com/!


Reading Rack

I'm a reader.  Always have been.  But, especially since having kids I find that nothing beats a good novel to escape into.  I've been known to start a book after putting the kiddos to bed and keep reading until it's done.  I wouldn't recommend it.  It makes for very grumpy mornings.  But, with the right book, sometimes I just can't help myself.

This morning during a jaunt to Hobby Lobby I came accross this little number:

I think it was originally intended as a plate rack but to me it screamed, fill me with books and put me on your nightstand. 

And so I did.

Now I have a special place to store my current stash of reading material.  And it looks pretty cute too.  This nifty piece of organizational nirvana was on sell this morning and thus only set me back $6.

I just love that Hobby Lobby!

Kitchen makeover

When we moved into our house, our cabinets looked like this.

But, the past few weeks have involved a lot of paint and sanding and even a miter saw.  This post is all about our kitchen progress.  I must confess, my "after" pictures have been strategically taken to hide the unfinished parts.  I'm during this transformation in stages because, well, I have a sixteen month old.  That's really all the explanation that's necessary.  I'll be posting my progress here and hopefully in several weeks, they'll be true "after" pictures to share.

First off...the crown molding.  To begin with, there was only a little dinky sad excuse for crown molding atop my cabinets.  I considered removing it completely to make room for the real stuff, but then I realised it could stay nicely as a separator.  So, it stayed.  My first project, therefore was to add a furring strip (a cheap 1 x 2") to the top of my cabinets.  This was necessary so there would be something for my molding to be screwed into. 

Notice I said screwed.  Originally I thought I could do the whole project with furniture nails.  But, I learned the hard way that those little nails were no match for my industrial strength molding plans.  The whole thing was litterally collapsing.  So, furniture screws it was. 

Next came a 1x6" board that wrapped all the way across my cabinets.  This was for hiegth.  My boring builder grade cabinets needed a lift to look established.

You can see if you look closely that I screwed another furring strip to the top of the 1x6"s but, this was entirely unnecessary because when I held the crown molding up I realised it would look best attached directly to the 1x6.  So, I used a ruler and drew a line all the way across the board about one inch from the top to act as my guide line so that I'd have some level molding.  No one likes unlevel stuff and gaps in the corners.

and finally came the crown molding.  I thought this would be a snap.  After all, I have a lovely miter saw that I'm very familiar with and has special little read lines to mark exactly which angle I need to tilt it to for crown molding.  But, I must admit, this made for one very tense afternoon.  I think I even cried at one point.  And those you tube video tutorials that made it look so easy weren't making me feel any better. Word to the wise, buy extra molding.  A lot extra.  But, we got through it and my miter saw and I will be one speaking terms again...someday.

I did pick up two very helpful tips.  Predrill your holes!  Nothing is worse than finally getting a board cut to the right length with the right angles only to have it split when nailing it up!  And secondly, after nailing up your molding, predrill a small hole at the top corner point where your molding meets and then using a small nail, attach them together.  The nail can be hidden with wood filler.  This holds your molding together so it lines up nicely with no gaps.  No gaps = no one will know you did it yourself.  Unless you blog about it of course.

Next came the easier though much messier stage of the kitchen redo.  I removed all the doors and hardware and then scuffed everything up with my electric sander.

Then everything got a coat of primer that is specially formulated to stick to shiny surfaces (a.k.a. fake foiled builder cabinets)

Next I went with a pure white semi-gloss.  I was so afraid of my cabinets turning out yellow that I decided to forgo the cream, offwhite, linen, etc. paintchips I'd been mulling over for a few months (that's how long it took me to muster the courage to take on this project).

Then came the magic part.  Antiquing glaze found at Lowes.  It's less than $10 for a bottle and a bottle goes a very long ways.  You just dry brush in on and then wipe it off.

It basically stays only in the corners and warmed up my bright white just a tint.  I'm in love.  I'll probably use it on all my painting projects for ever more!  You only think I'm joking.

After a week of sneaking into the garage when my baby didn't notice to put another coat on those doors...here's the result.

The bottom cabinets are still in progress and I hope to replace lights, paint the walls, add hardware, etc.  So, I'm far from finished but enjoying the process.

Play Room Art

This last weekend I snuck away with my Mother-in-law for a few minutes to peruse a garage sale on the corner.  So glad I did because I found several canvases in perfect shape for only 25 cents a piece.  I litterally paid for them using only coins from the bottom of my purse.  LOVE it when that happens!

There were a couple of 20" by 16" ones that were calling for immediate action.  This morning they received two coats of black paint.  (I used a semi-gloss interior latex because that's what I had on hand and I figured it would be more durable than my Apple Barrel craft paint from Walmart.  When Light Sabor duals are a daily event in one's house, durability is an absolute must!

Then I whipped out a couple of Alphabet decals using my vinyl cutter and rubbed them on. 


They went from blank canvases to hanging on the wall in just a few hours.  Easy peasy.

I'm going to post the decals on my Etsy shop in case you have a couple of canvases calling to you but need a little rub-on magic.