Showing posts with label Christmas. Show all posts

Merry Christmas!

Merry Christmas to all my readers!  Down here at Piccadilly headquarters, we've had lots of celebrating:

My munchkin is the one with the Yoda ears.

We've been visiting lots of friends and neighbors, bringing them Piccadilly signs and whatever fresh baked treats survived our hungry mouths.

My office has been bustling getting out Christmas orders.  This picture was taken at an unusually tidy moment.
We've had great times with our out-of-town visitors.
Gobbling lots of yummy food such as these reindeer pancakes (thanks pinterest)

And this Christmas feast.
There's been some pageantry.
And lots of gift giving.
And unfortunately, a fair bit of germ swapping.  Can't wait till I'm feeling a little better because I have a couple more Christmas crafts to work on before packing up my decorations next week.  It seems a little silly to make Christmas crafts after the holiday.  But, I'd love to get them finished up while I have the time so I can enjoy them stress free next year.  Hope you all enjoy the rest of your holidays!

Our Christmas Traditions

Christmas is by far the highlight of the year for me.  I stretch it out as long as reasonably possible.  The decorations go up right after Thanksgiving and don't come down till that new years ball has dropped.  Even though its almost behind us, I wanted to share a few of my favorite traditions with you.  They're nothing complicated but they do make us happy and thus are worth repeating.  


Firstly, the card pantry.  Every year I try to get my Christmas cards in the mail right after Thanksgiving to make sure everyone on the list is given our correct address (we move a lot) and a little Christmas card enthusiasm.  I know that postage has gotten expensive and I know that blogging and face book has taken away a lot of need for the traditional card.  But, I STILL LOVE THEM!  Opening my mailbox in December is THE BEST.  It warms my heart to see the sweet notes and smiling pictures of our loved ones.  I'm hanging onto this tradition as long as I can!


Another tradition we love...our Christmas Eve TAMALE FEAST!  They may not pretty, but we love these tasty guys.  Maybe it's because we live 2 hours from the border, or maybe it's because half the US population is now Hispanic, but the stores around here always have lots of Tamales on hand the week before Christmas.  Every year I tell myself I'm going to learn to make them, and every year I just buy them instead.  Hey, I'm not super mom or anything.  Plus, Costco makes some very delicious tamales!


A cute little tradition that came from my husband's family is to have a birthday cake for baby Jesus with our Christmas dinner.  I love how this helps the young crowd remember why we really celebrate Christmas after all and it leads to great conversations during Christmas dinner.  And, I LOVE the way a few cheap candy canes dresses up a simple white cake from a box.  My secret ingredient is a cup of coconut mixed into the butter cream.  YUM!  This cake is never around for long.


And I saved this one for last because I have a fantastic recipe to share.  Every year we have Butterscotch rolls for breakfast.  You have to try these because not only are they a crowd pleaser, but they take just a few minutes to put together.  Here's the famed recipe:


Christmas Morning Goodness (Butterscotch Rolls)


18-24 Rhodes rolls
1 package butterscotch pudding (not instant)
3/4 cup brown sugar
1/2 cup butter
1/2 cup chopped nuts (optional)

Layer rolls in a well greased bundt pan - don't thaw.  Pour dry pudding mix over rolls.  Melt butter and brown sugar and pour over rolls, then sprinkle with nuts.  Let raise 8 hours to overnight.  Bake at 350 for 45 minutes (watch closely after about 30 minutes so that they don't burn).

Enjoy!

aftermath

I went a little crazy at the after Christmas sales.  Soooo many good deals.


My number one after Christmas shopping tip is to buy next year's wrapping paper at World Market.  They always mark their wrapping paper down by 75%.  That's a bit better than the 50% off that most stores offer.  And furthermore...their wrapping paper is THE BEST. We're talking big rolls of thick, gorgeous paper.  I get asked every year where I get my cute paper and well, there you have it.


After my little shopping spree.  I came home and picked these from my garden.


I live in THE STRANGEST place.  Seriously, it's almost January and I'm getting bushels of tomatoes.  Last week I made a big pot of spaghetti sauce with them.  Anyone know a good salsa recipe!?  

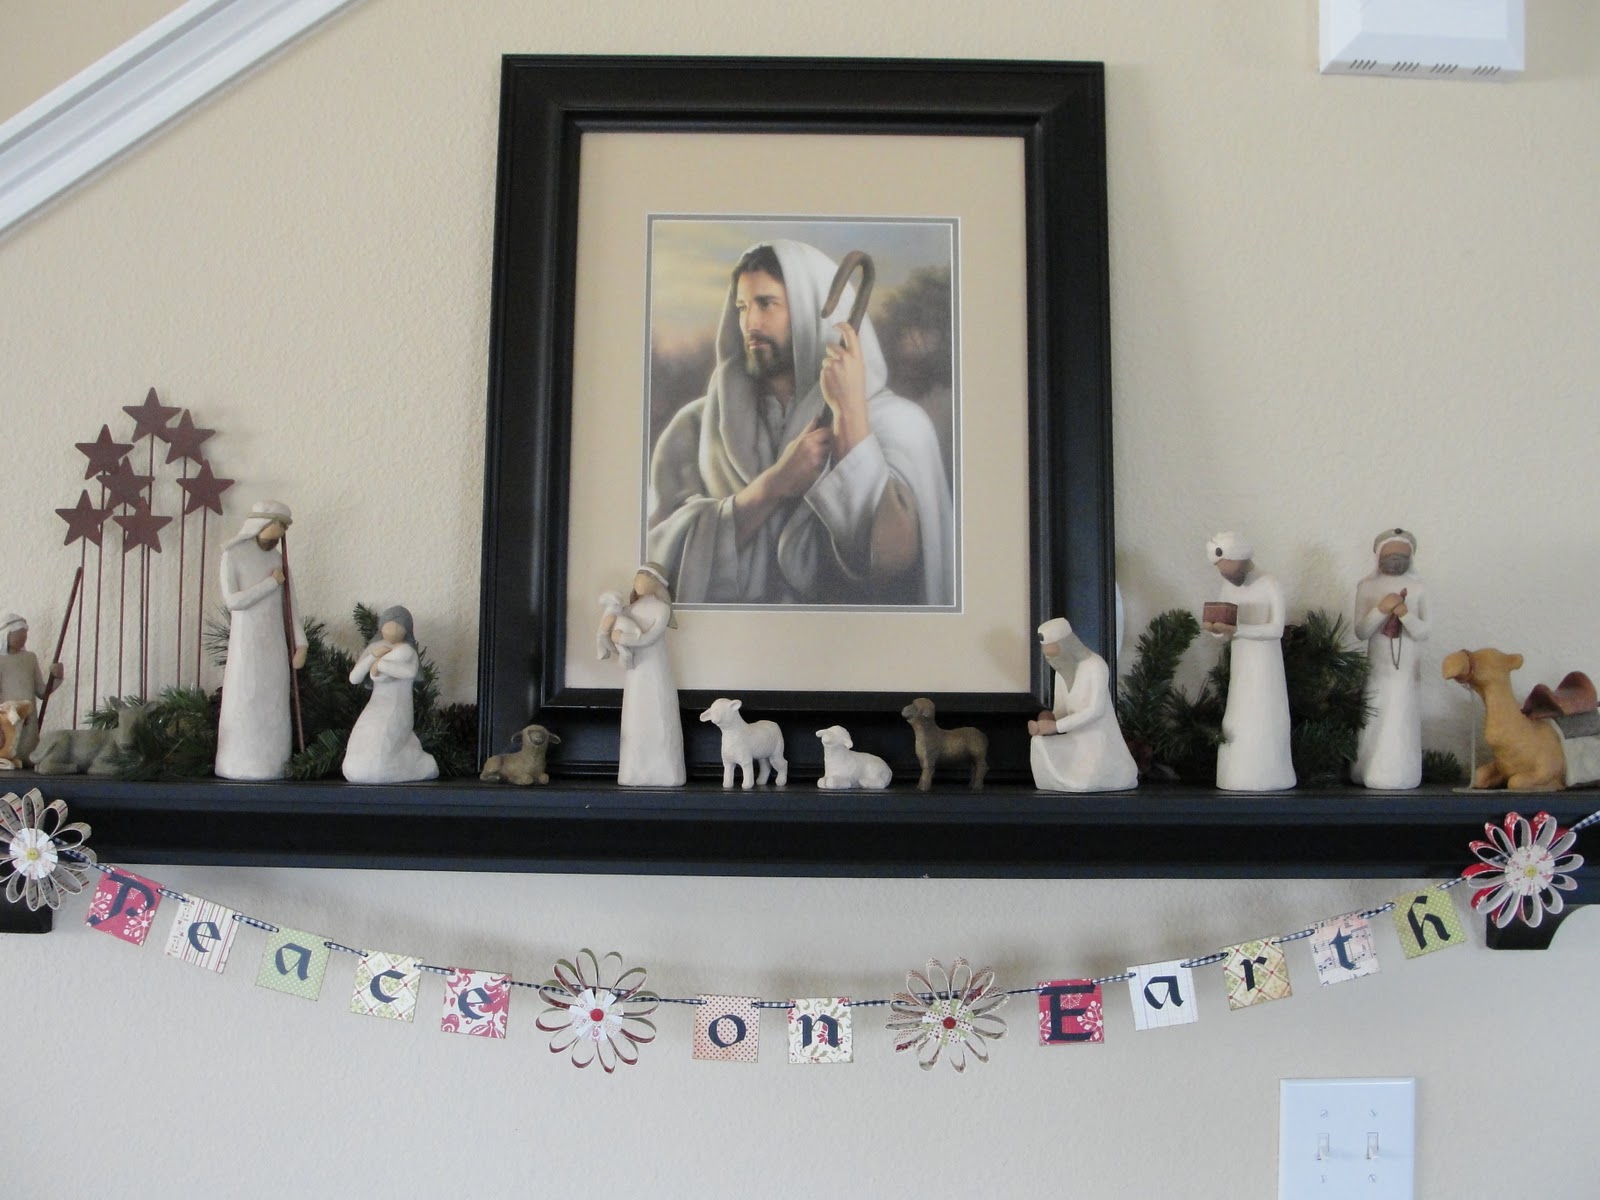
Peace on Earth Garland tutorial

This little Garland has been adorning my mantel this holiday season.  I wanted to share a tutorial on its creation.


It all began with the lovely tinsel & twig paper collection by The Girls' Paperie
I modge podged swatches of the paper onto 2" square chip board
Each square was then hole punched in the top corners.  
I created some vinyl letters for myself and rubbed them on.  Then, I strung the decorated chip board on some ribbon.
The paper flowers were made using 12 strips of 4" by 1/5" paper.
Each was folded and scotch taped at the end.  Then a little hot glue connected them all at the center.  I glued together a set of six at a time and then connected the two halves.  The centers were pre-made dimensional stickers from the twig and tinsel paper collection. But, you could probably substitute buttons, flowers, etc.
The flowers got a couple of hole-punches too and slid up next to the chipboard.
The whole garland was lite enough to tape up with scotch tape.
Here's to much, much more Peace on Earth!


I just might link up to a couple of these parties:

Christmassy time of the year

I hopped onto Becky Higgins (isn't she the best!) blog for a few minutes this afternoon and got inspired by her family's holiday decor.  I may not be Becky but, I do have some favorite decorations around my house that make me feel merry and bright this time of year.  I wanted to share some of them with you.
An oldy but a goody, I used to sell tons of these stackers at Mckinney Trade days.  I saved on for myself and am glad it's still around.


My impromptu wrapping station came about because I was tired of dragging the gift wrap box out from under the bed every other day.  I love these colors and lots of polka dots!


To remind me what snowflakes look like :)


My sweet SIL gave this sconce to me for my birthday.  I'm looking forward to changing it's topper seasonally.


found this cute guy at a Christmas bazaar a few years ago with my mom.  Now he sits in the kitchen window.


LOVE this idea!  just turn a bell jar upside down, fill with ornaments and then cover the bottom to upright.  My bell jar is from West Elm but, I found it at the outlets for $4!  I know, SERIOUSLY filled with possibilities.


A close up of the Christmas tree.  I couldn't get the lighting right to take one of the whole thing.  It's fairly eclectic but tons of memories in those ornaments.


A new addition this year.  The letters were originally a plain white from Hobby Lobby and I jazzed them up with scrapbooking goodies.


My favorite...our nativity scene!  My mother in Law sent a section of it each year for several years.  I love having a beautiful nativity to remind us each year what we're really celebrating.
Here's a close-up of the garland.  Maybe if I get really on the ball, I'll post a tutorial of this one.  


That's all for now.  There's more, but my dinner is burning.  What are your favorite holiday decorations?

Noel

Here's a little something I've been working on.


Unfortunately, I don't have a tutorial for this one since the center piece is a metal plate that I had to commision a sheet metal supplier to make for me.


However, I do have them posted over at my Etsy shoppe.


I'm saying Adieu to the Christmas crafts for at least a few weeks. But, no worries, I've been cooking up a bundle of new projects that will be making their way onto the blog shortly.

Let it Snow

Growing up in the south, one learns just how magical snow is.  We hoped and prayed for the elusive stuff every time a northern front moved our direction.  On the rare occasion flakes started falling, we'd scuttel outside as fast as we could to soak it up because you never knew how long those flakes would last.

Such was the inspiration for this craft.  The creation process was very similar to how I made the JOY blocks earlier in the month except I stained the blocks rather than painting them.

Just for an extra measure of whimsy, I sprinkled some glitter on one of the sets when the modge podge was still wet. 

Maybe putting these on the mantel will bring us a snow day next winter - one can only hope!
If you're interested, I am going to be selling a couple sets of these over at my Etsy Shop.
Check out the linky parties I've joined here.

Ruffled Dishcloth

As my trusty followers know, I'm working on a little segment known as Christmas in July.  My kitchen can always use some festooning during the holidays so I wanted to try my hand at some festooned dish towels.  I'm usually not much of a fan of commercially sold holiday dish towels.  They're typically hum drum and sometimes even boarderline kooky.  I've definately seen some great ones, but didn't find their price tag really all that great.  But, here's a little solution that even a novice sewer can enjoy.  Seriously, this would be a fantastic project for a novice sewer.  First of all, no one has to WEAR it!  It's not going to hang on your windows for a decade.  It's just a dish towell.  Something you'll probably toss in a couple seasons.  Unless of course you decide to frame it. 

Here's the tutorial to prove just how simple they are.

Start with some absorbant fabric (white, colored, printed - whatever floats your boat)  Cottons are good.  Fold it on itself to cut an even rectangle.  The size isn't super important, use one of your old dish towels as a guide if you want. 

Then sew a 1/4" rolled hem on all four sides (fold in 1/4 " - iron - fold in 1/4" again - iron again - and sew.)

Next cut an approximately 2 inch wide strip of fabric for your ruffle.  It should be about twice as long as your dish towel is wide.  I had to stich together a couple of strips because my scrap of fabric wasn't long enough.  I just hid that seam inside one of my "ruffles"

Then go ahead and stich around all four edges of your ruffle piece about 1/4" inside the edge.  This allows it to fray some without completely unraveling and creating a stringy mess in your dryer.

Now comes the fun part.  When you sew on the "ruffle" simply free-form the gathers as you go. 

Next you can embellish more if desired with ribbon, buttons, ric rac, etc.

Here she is!

And just because I need a little more PINK in my life...

Now wasn't that easy!?

Check out the linky parties I've joined here.

Christmas in July Card Swap

While day dreaming about all the Christmas crafts I could do this month, it occured to me that I'm going to need a bundle of cards to send out come this December.  We moved since last Christmas card season, leaving some amazing friends behind.  Thus, my card list has expanded.  I previously bought a couple boxes of cards at the after Christmas clearance section at Target.  But, those aren't going to quite cover it.  So, I gave myself a challenge - see how many cards you can come up with using only materials from my stash in one afternoon.  Admittedly, the afternoon stretched into dinner time and bedtime.  It pretty much looked like a bomb went off in my kitchen.  But, I accomplished a goal, so who really cares about that kitchen anyway.  Here's the results.


I was suprised at how quickly those creative juices flowed once I convinced myself that they weren't going to be perfect.  I was using leftovers after all.  But, I ended up making 23 cards that I'm not entirely too ashamed to mail and they didn't cost me a dime (until I think about postage - yuck).  If we happen to be personally aquainted, tell me which one is your favorite and you just might see it in your mail box come December.

Check out these linky parties that I've joined